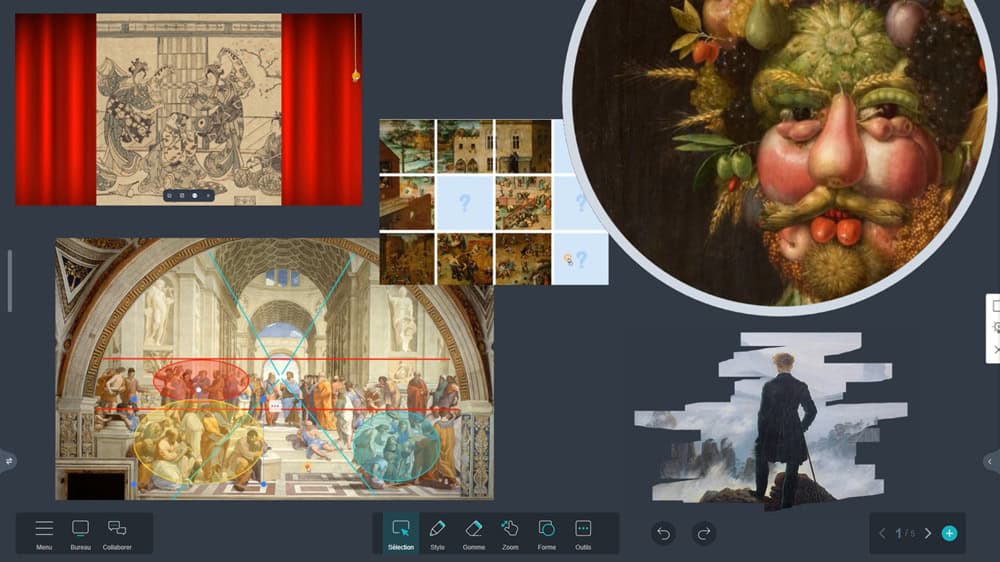
Spark curiosity, analyze the composition of a work, help students focus on the details of an image… With the Iolaos whiteboard software, teachers can switch between various tools to study an image on the classroom’s interactive whiteboard. In this tutorial article, we review these tools that are useful for image analysis.
🖼️ Insert an image into Iolaos (↑)

(1) To insert an image on a slide in Iolaos, click on the Menu > Media button: your file explorer will open.
(2) To insert your image, click the upload icon…
(3) …or simply drag and drop it onto your slide.
🔦 Highlight part of the image with the spotlight (↑)
Discover an artwork by exploring its smallest details using the spotlight. In the General Tools tab under the Tools button, select the Spotlight. As you’ll see, the spotlight also works as a magnifier!

(1) Choose your spotlight shape: round or square.
(2) Keep the area outside the spotlight black or illuminated.
(3) Move the spotlight by holding your finger inside the spotlight area.
(4) Adjust the diameter of the round spotlight by stretching its edge.
(5) Click Exit to close the spotlight.
🎭 Reveal your image with a curtain (↑)
Set up observation games where you open and close a curtain over the studied image. In the General Tools tab under the Tools button, select the Curtain.

(1) By default, the curtain covers the entire slide.
(2) Open the curtain by clicking on its cord or the 3rd button in its context menu.
(3) Adjust the curtain to fit your image by clicking the 2nd button in its context menu.
(4) Replace the curtain image with one of your choice.
👋 Erase to uncover the image (↑)
Spark students’ sense of discovery by letting them erase a mask that hides an image. Fun and effective for building interest!
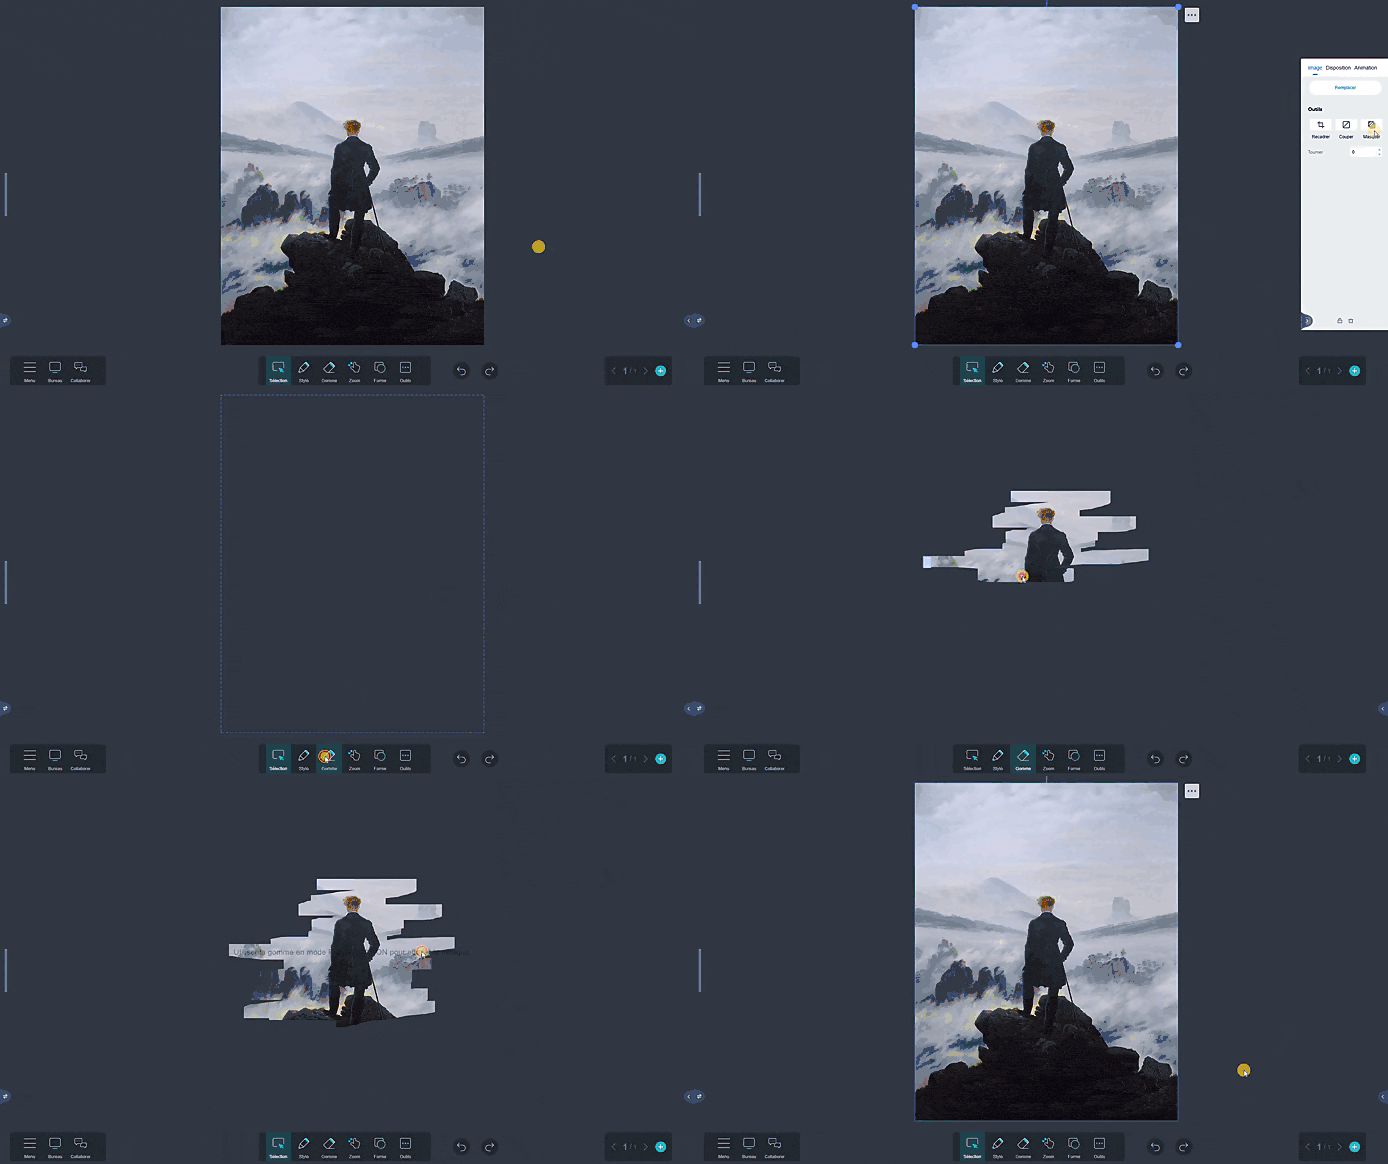
(1) Select the image, then open its properties panel by clicking the arrow at the bottom right of the whiteboard.
(2) Click Mask.
(3) Select the Eraser from the main toolbar and erase to reveal the image.
(4) Remove the mask by returning to the image’s properties panel and clicking Mask again.
🧩 Rebuild an image with the puzzle (↑)
Encourage students to focus on the details of an artwork through the playful approach of a puzzle.

(1) Click on Tools, then on Jigsaw puzzle.
(2) Choose a background from the 12 available, then click Next.
(3) Import an image from your file explorer by clicking the “+”.
(4) Increase or decrease the number of rows and columns in your puzzle, then click Confirm.
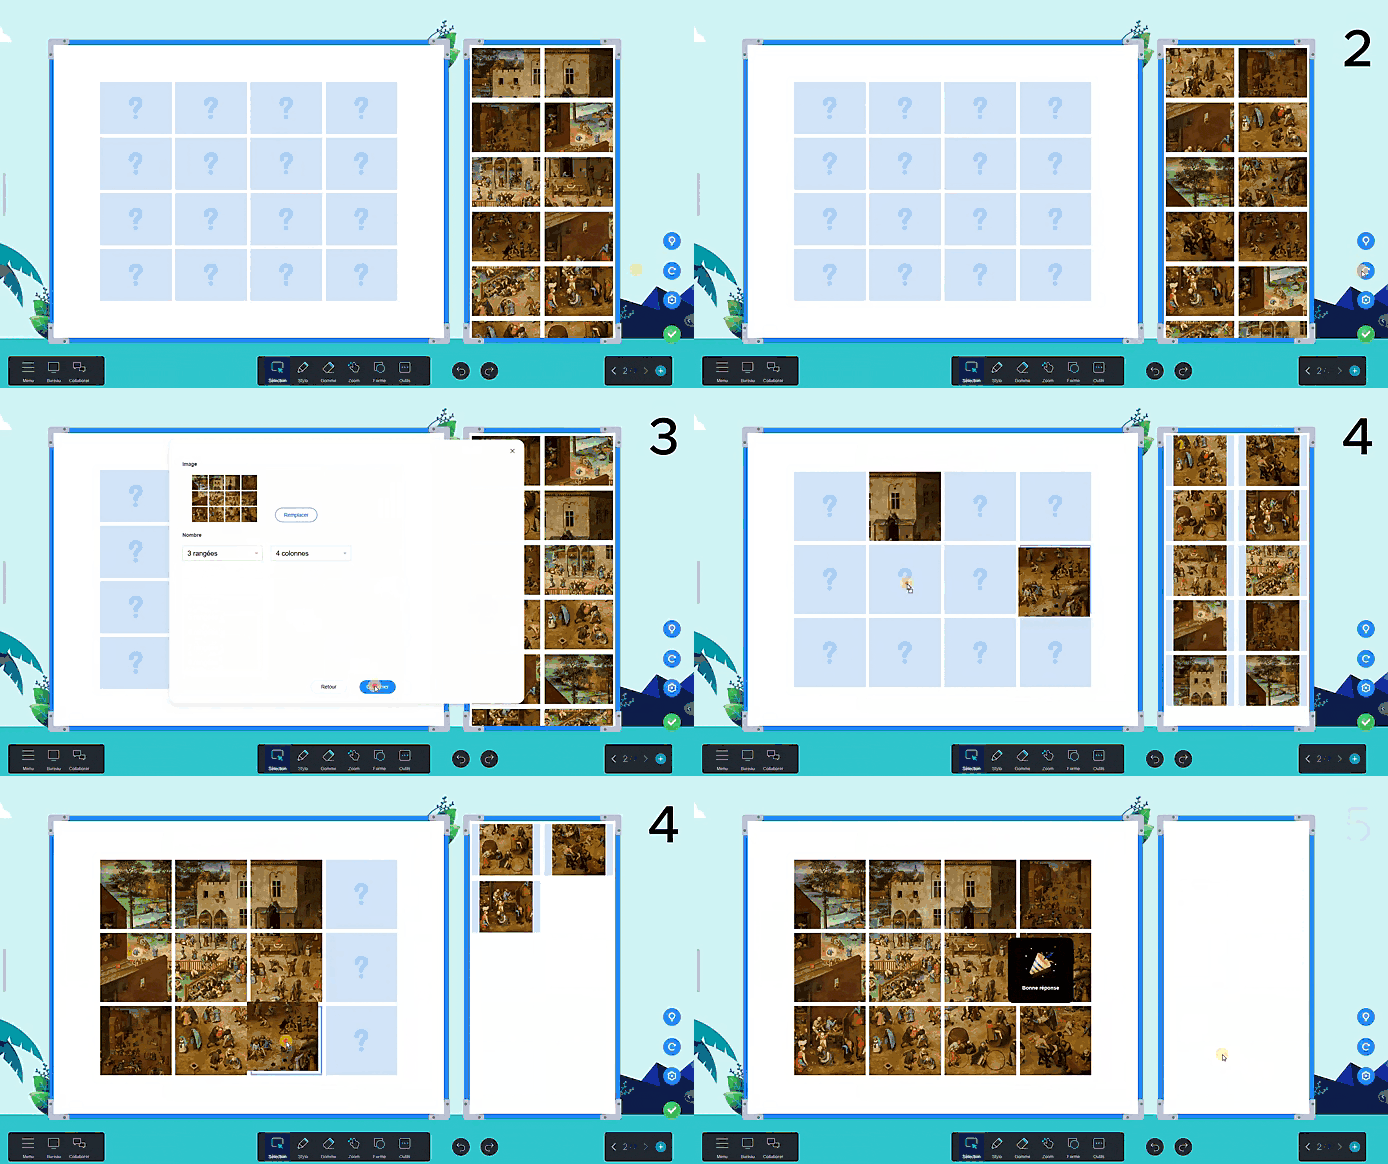
(1) To make the game easier, display the board as a background.
(2) Reset the puzzle and shuffle the pieces.
(3) Adjust the number of rows and columns in your puzzle.
(4) Drag and drop puzzle pieces onto the board.
(5) Check the solution.
✂️ Capture image areas with the capture tools (↑)
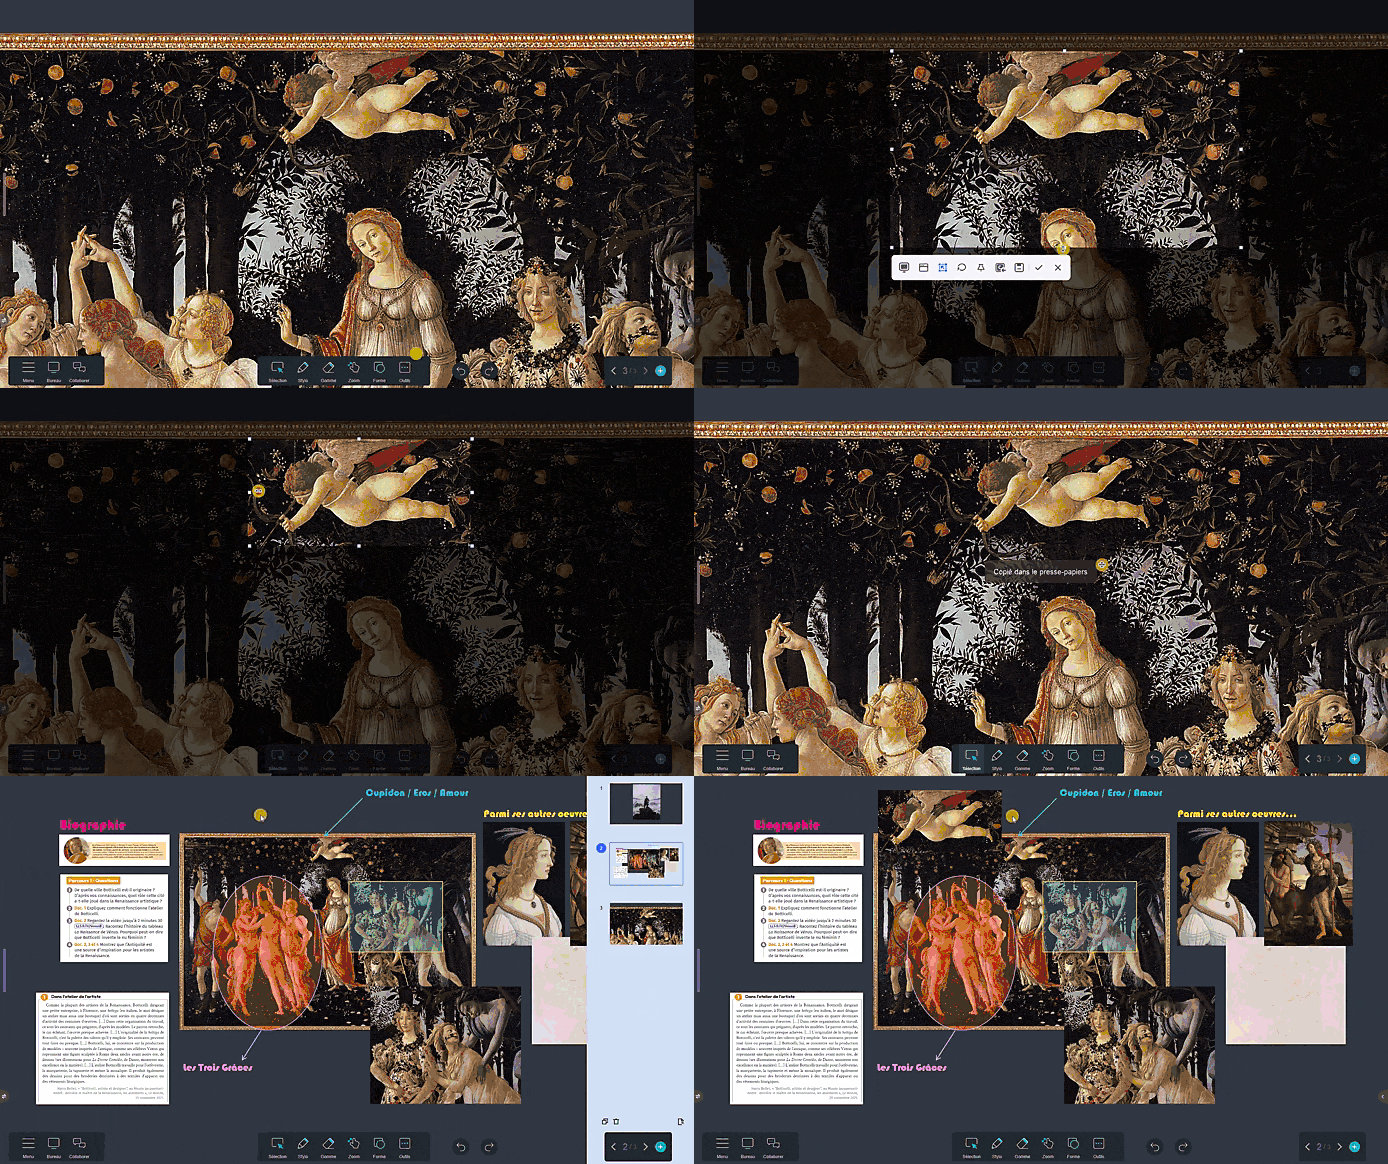
Isolate elements of an image or artwork for better analysis using Iolaos’ capture tools.

1. Switch between Desktop and Iolaos to take a screenshot
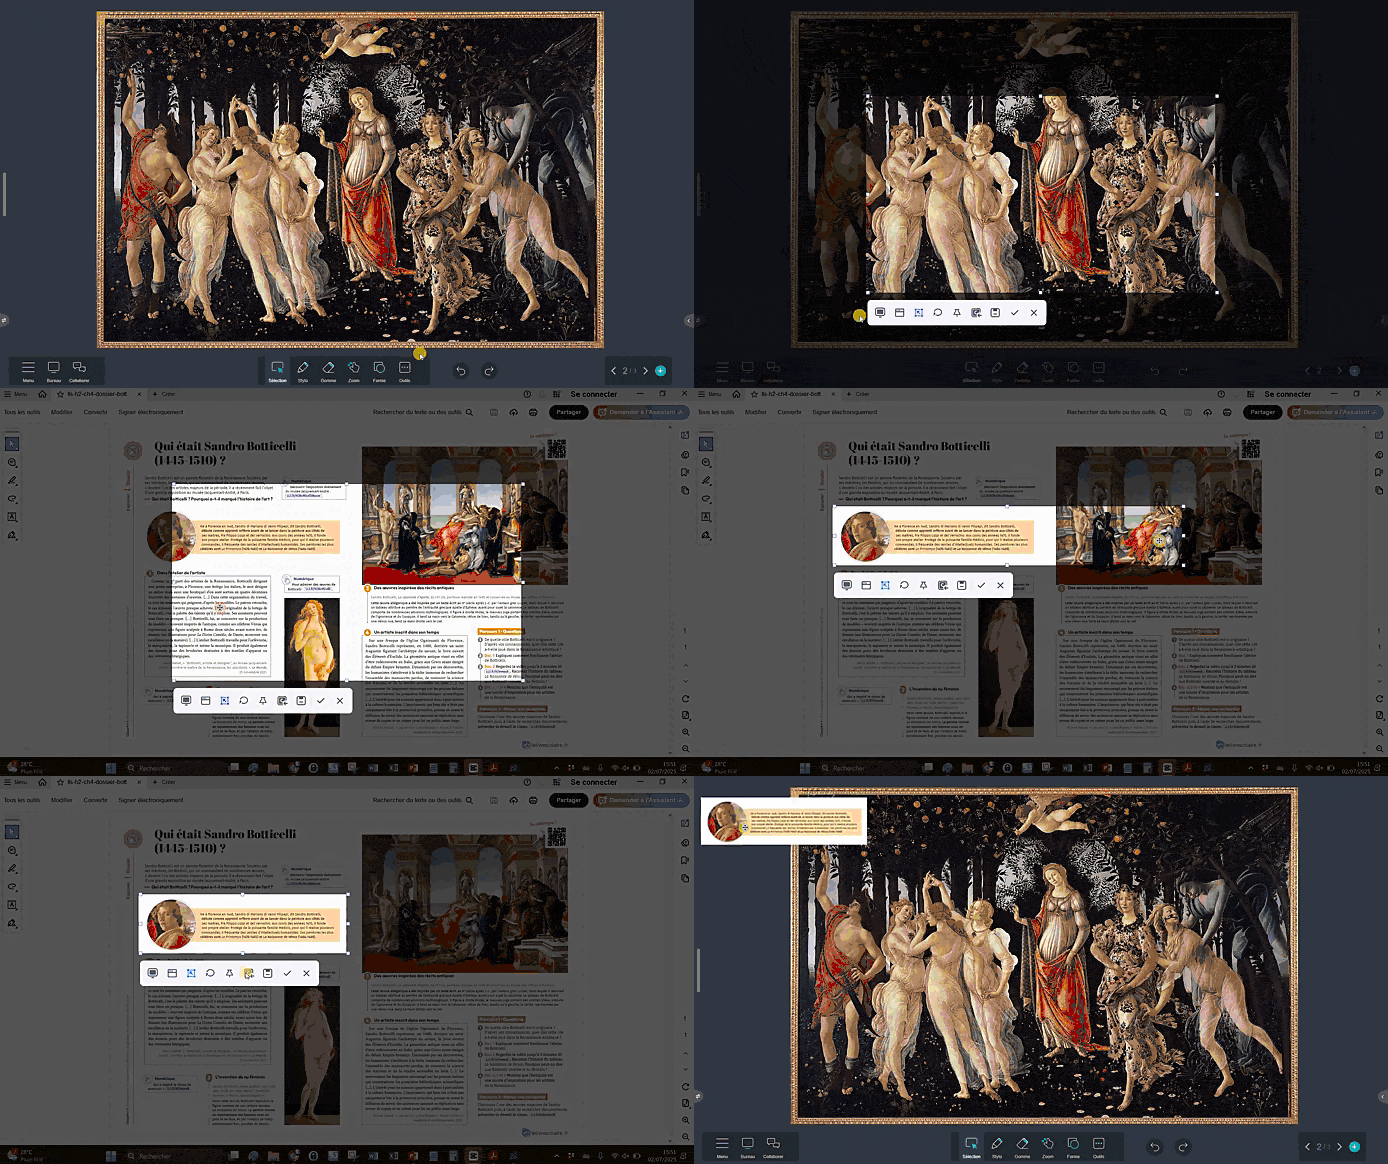

- In the General Tools tab under the Tools button, select the Screenshot Tool.
- Click button [1] to switch to your desktop and take a capture.
- Click button [1] again to return to Iolaos and paste your capture by clicking button [6].
3. Area capture, freeform capture, pin
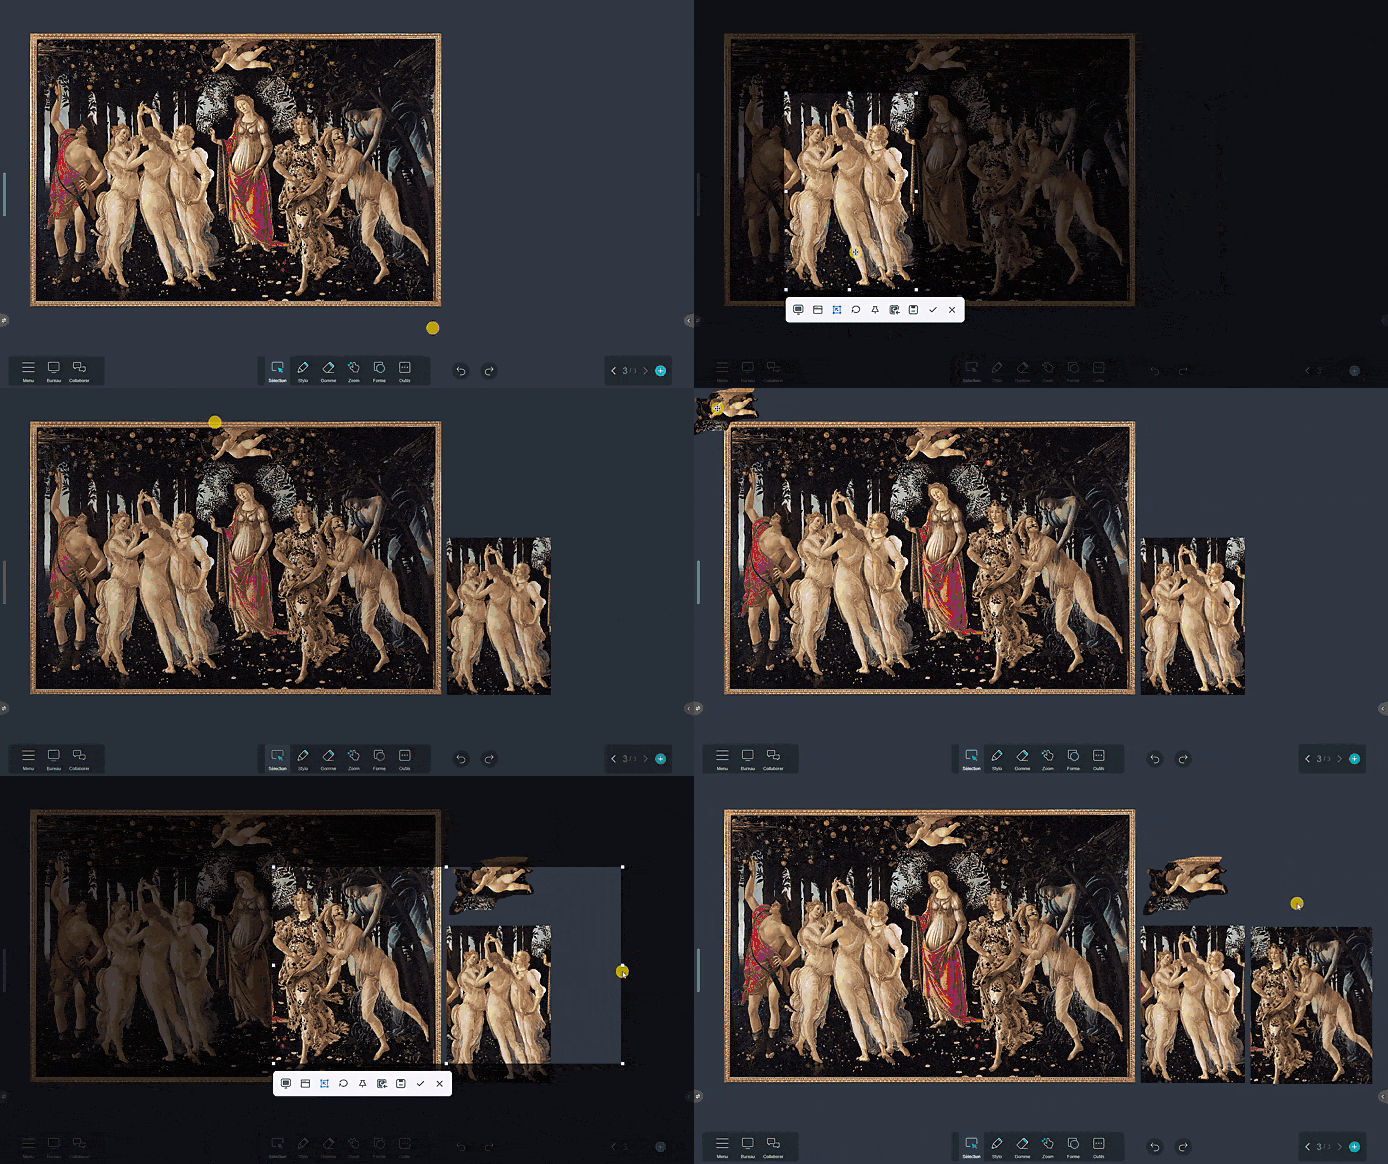

(1) Area Capture: When opening the capture tool, button [3], which allows area capture, is activated by default. Adjust the height and width, then paste it onto the slide with button [6] or save it.
(2) Freeform Capture: Click button [4] to draw the outline of your capture manually.
(3) Pin: Button [5] gives you an enlarged view of the captured area.
4. Paste your capture onto another slide

- Once your capture is defined, click button [8]: your capture is copied to the clipboard.
- Navigate to the slide where you want to paste the capture.
- On a PC, right-click and select Paste. On the interactive whiteboard, long-press with your stylus or finger on the slide and tap Paste.
✏️ Analyze a work using the drawing tools (↑)
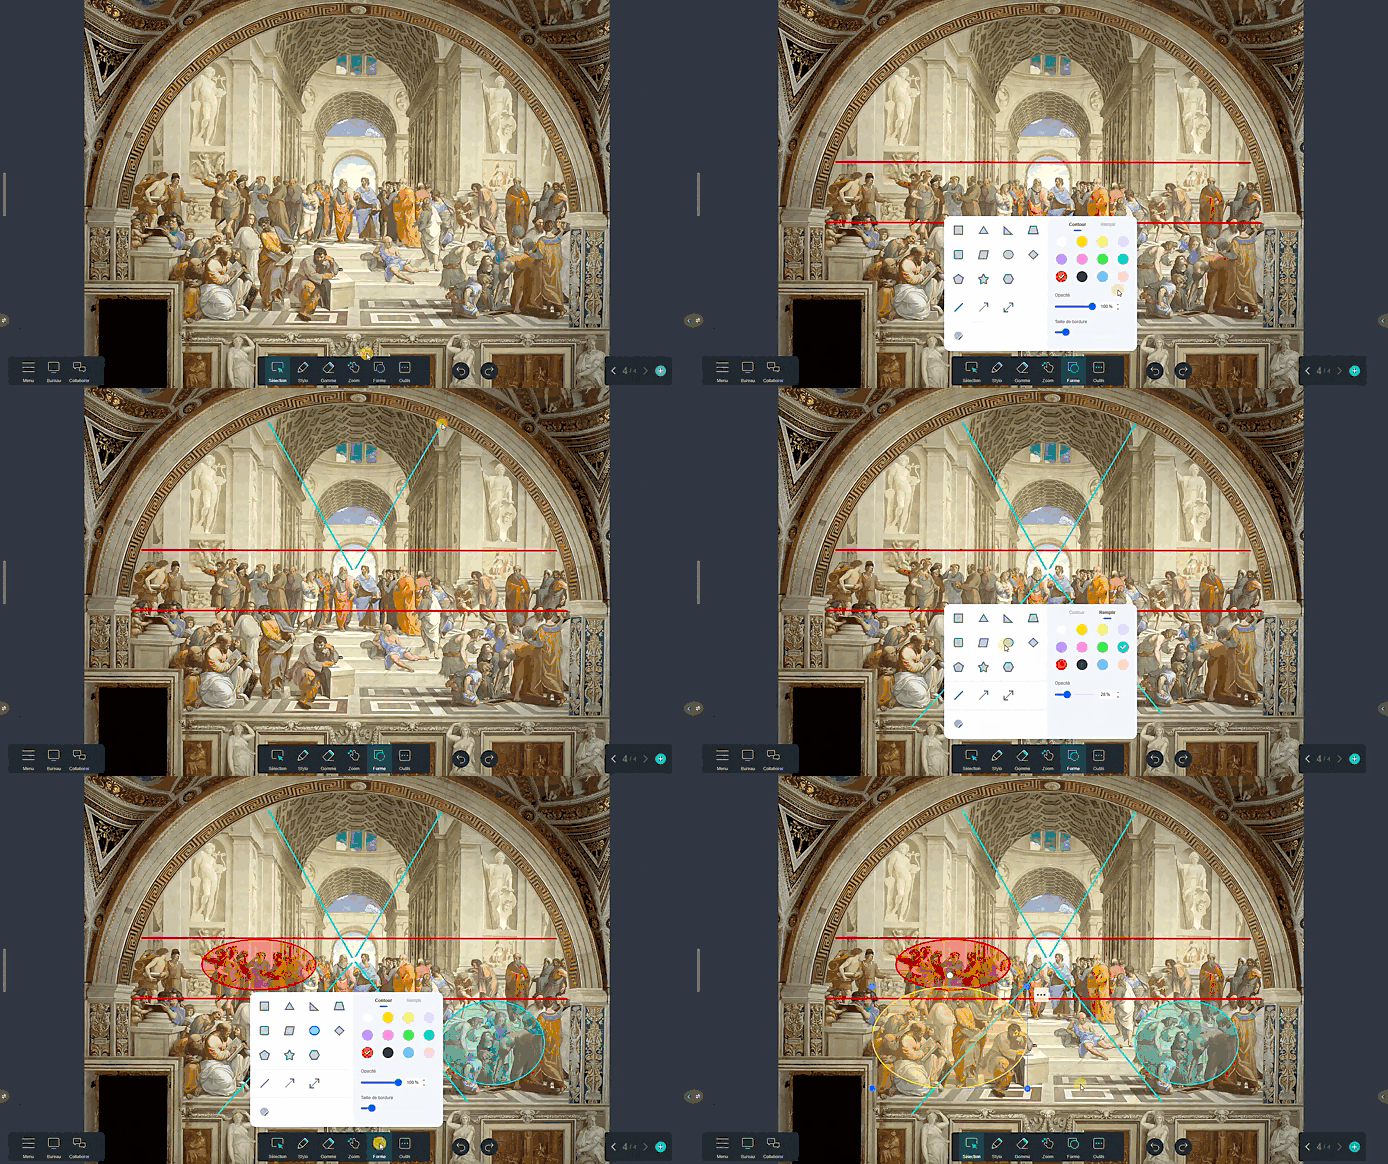
Highlight the composition of an image, its guiding lines, its structure using the shape-drawing tools. Click the Shape button in the central toolbar to access drawing tools.
For more articles on Iolaos
- Iolaos Tutorial No. 1: Preparing Your First Teaching Materials on Iolaos (PC)
- Iolaos Tutorial No. 2: Creating Interactive Exercises for Your Classroom Interactive Display
- Teach Writing on the Interactive Display with Iolaos Whiteboard Software
- The Hidden Features of Maps in iolaos (Geography and Life Sciences)
- Using a Document Camera with the Iolaos Whiteboard Software
- Teaching Math with Iolaos Tools (1/2)
- Teaching Geometry with Iolaos Tools (2/2)
- Opening Flipchart Files on the Iolaos Whiteboard Software
- IOLAOS : the 3 advantages of our new educational software for teaching on a Speechi interactive display
Posted on July 4, 2025.
