


At the start of the September school year, you found out that your class would welcome a student who speaks little or no English. Suddenly, a thousand questions come up. How can you make sure this student doesn’t feel excluded from a lesson designed primarily for English-speaking students? And how can you ensure that this extra effort for inclusion doesn’t make your life as a teacher unmanageable?
If you have a Speechi interactive flat panel that gives you access to Speechi Connect, good news! You can take advantage of a very useful feature: Speechi Talk, which transcribes everything you say on the interactive screen into the foreign language you’ve selected.
Speechi Talk: In-Class Use
How does it work in practice?
As usual, you log in to the Interactive Display to bring up your personal workspace with your wallpaper, files, and applications.
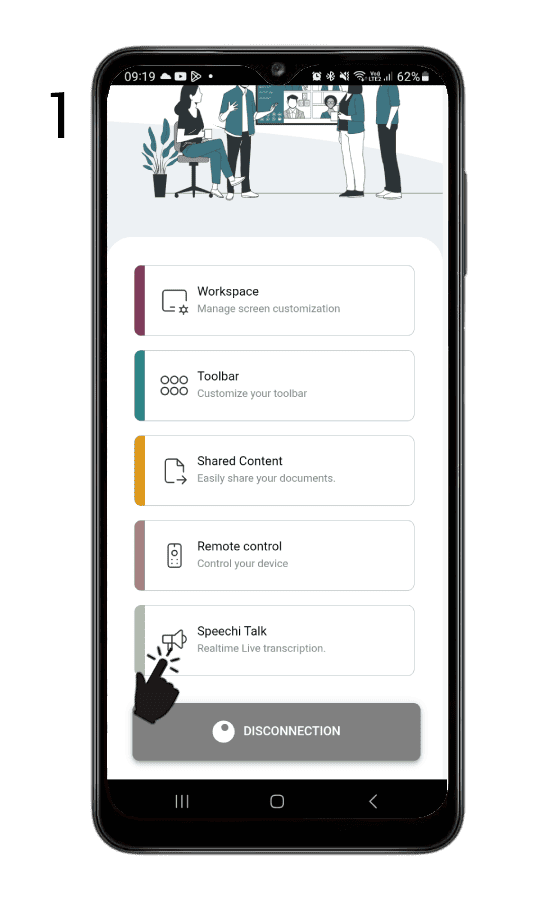
Before starting your lesson, you’ll go through a quick intermediate step that only takes a few seconds. In the Speechi Connect app menu, click on the Speechi Talk button, adjust the two required settings, then start speaking into your device’s microphone*.
Your words will then be displayed at the top of the Interactive Display, transcribed into your allophone student’s language. At the end of class, when you stop Speechi Talk, you can download a document containing the transcript of your speech in your own language. You’re free to give it to the student as is, or edit it beforehand.
* The microphone can be your phone’s mic or an external mic connected, for example, via Bluetooth to your PC, tablet, or smartphone. If you have them, AirPods-type devices also work.
Using Speechi Talk in Class
Tutorial
Step 1 – Log in
Log in to the Interactive Display with your Speechi Connect app:
- via your phone by scanning the QR code on the screen,
- or via your PC by entering the code shown under the QR code on the screen.
In the Speechi Connect menu, the last tab “Speechi Talk” becomes available. Click on it.
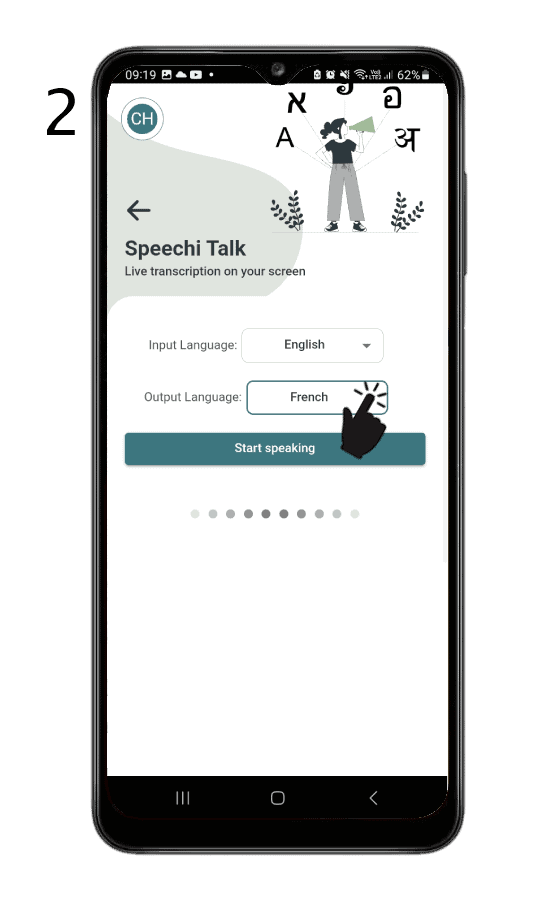
Step 2 – Set the languages
You’ll need to configure two settings:
- Choose the input language: the language you will speak in during class.
- Choose the output language: the language of your allophone student.
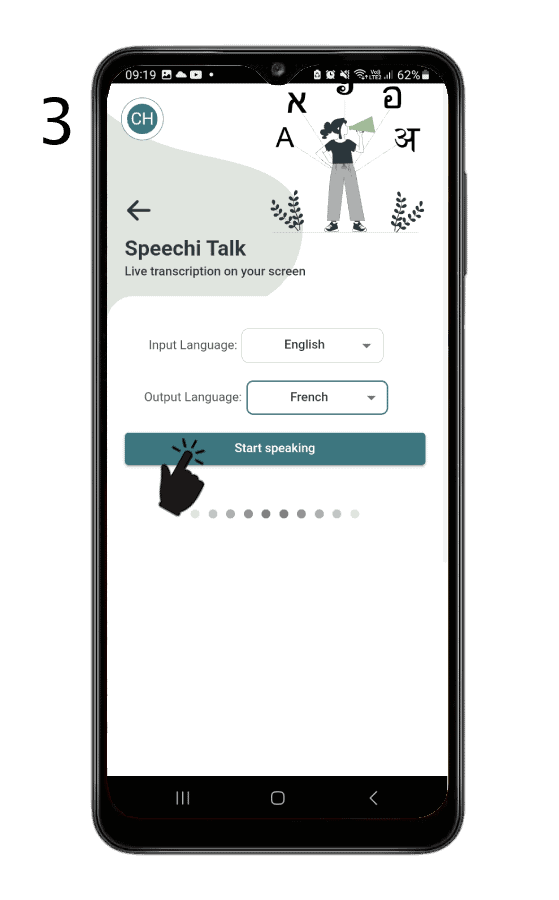
Step 3 – Speak
Click on “Start speaking,” then talk into your device’s microphone (the example here uses a smartphone). You’ll then see your speech appear at the top of the interactive screen, transcribed into the selected output language.
Step 4 – Adjust the transcription display
To the right of your transcribed speech on the Interactive Display, you’ll find two control buttons:
- The first button lets you adjust the text size (3 sizes available).
- The second button lets you display the transcription in full screen or reduce it to the default banner at the top of the screen.
Step 5 – End of class
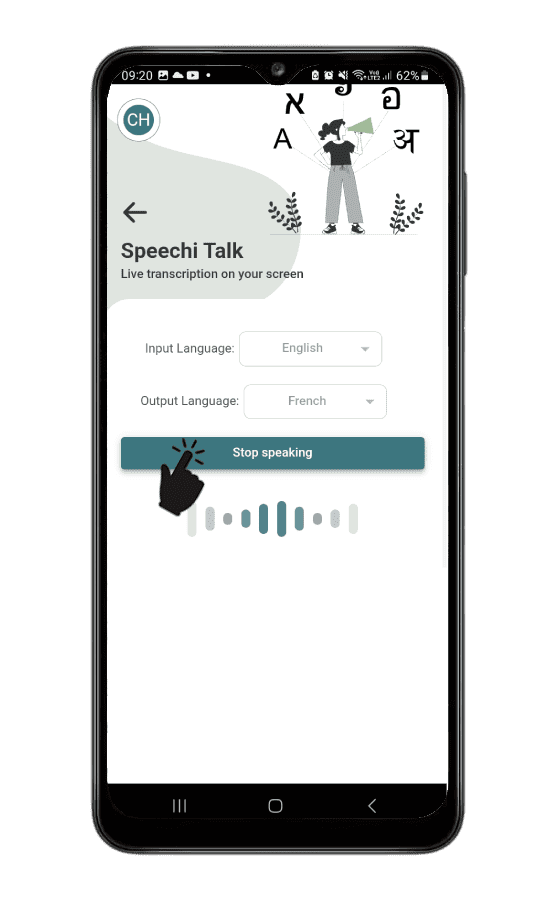
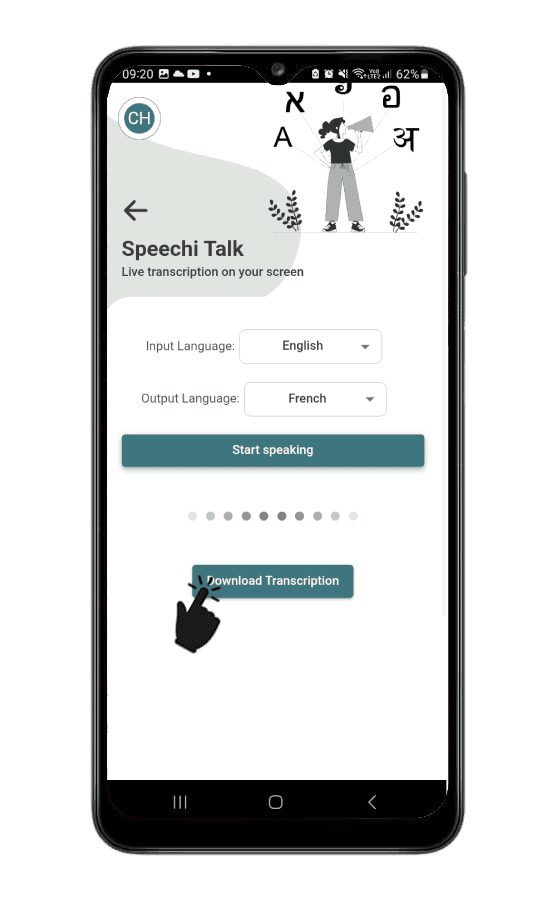
Slide 1 – Once your lesson is over, click on “Stop speaking.”
Slide 2 – Retrieve the text of your speech by clicking the button “Download transcription.”
Slide 3 – The example here shows a download via Google Docs, allowing you to save the document to your Drive and edit it if you wish.
Slide 4 – To find your document, note that it will be named as follows: “speechi-talk_date-time.”
Our Articles on Speechi Connect
- Talk, Stream & Vault: The 3 New Speechi Connect Features Coming Soon to Your Speechi Interactive Display
- Speechi Connect & its app store
- Teaching maths with educational apps from the Speechi Connect store
- Speechi Connect on your company’s interactive display: what’s the benefit?
- Class Connect on Speechi Interactive Displays at My School: What’s the Benefit?
- Connect Tutorial #1: Personalize My Speechi Interactive Display
- Connect Tutorial #2: Sharing My Files on the Speechi Interactive Display
- Connect Tutorial #3: Introducing the Swift Bar, the Key Feature of the Speechi Connect Interface
- Connect Tutoriel #4 : Starting a video conference with Speechi Connect
- A Day of Teaching with Class Connect
- A Workday with Speechi Connect
- New in Speechi Connect: An Even More Personalized Interactive Experience
Published on 17 September 2025
 Talk, Stream & Vault: The 3 New Speechi Connect Features Coming Soon to Your Speechi Interactive Display
 Interactive whiteboards for kids and students in the classroom
 The Document Camera: A Tool to Improve Students’ Daily Lives
 Take teaching to the next level with digital whiteboards for home, homeschool and students
 Transforming the classroom – digital whiteboards for teachers and students