


In this tutorial, we explain how to easily benefit from secure access to your personal Drive through your Speechi Connect account.
Cloud Connect, available in the Advanced and Premium plans, was developed by our Lille-based development team so that, once connected to a Speechi interactive display, you can access your Drive directly while being assured that this access is 100% secure.
Mini FAQ (↑)
What do we mean by secure access to your Drive?
› The idea is to ensure that no login credentials or sensitive data are left behind or stored on an interactive display after you log out.
How is this ensured?
› By allowing you to access your Drive in read-only mode. This way, your original files cannot be modified or accidentally deleted.
What if you still want to work on a file from your cloud?
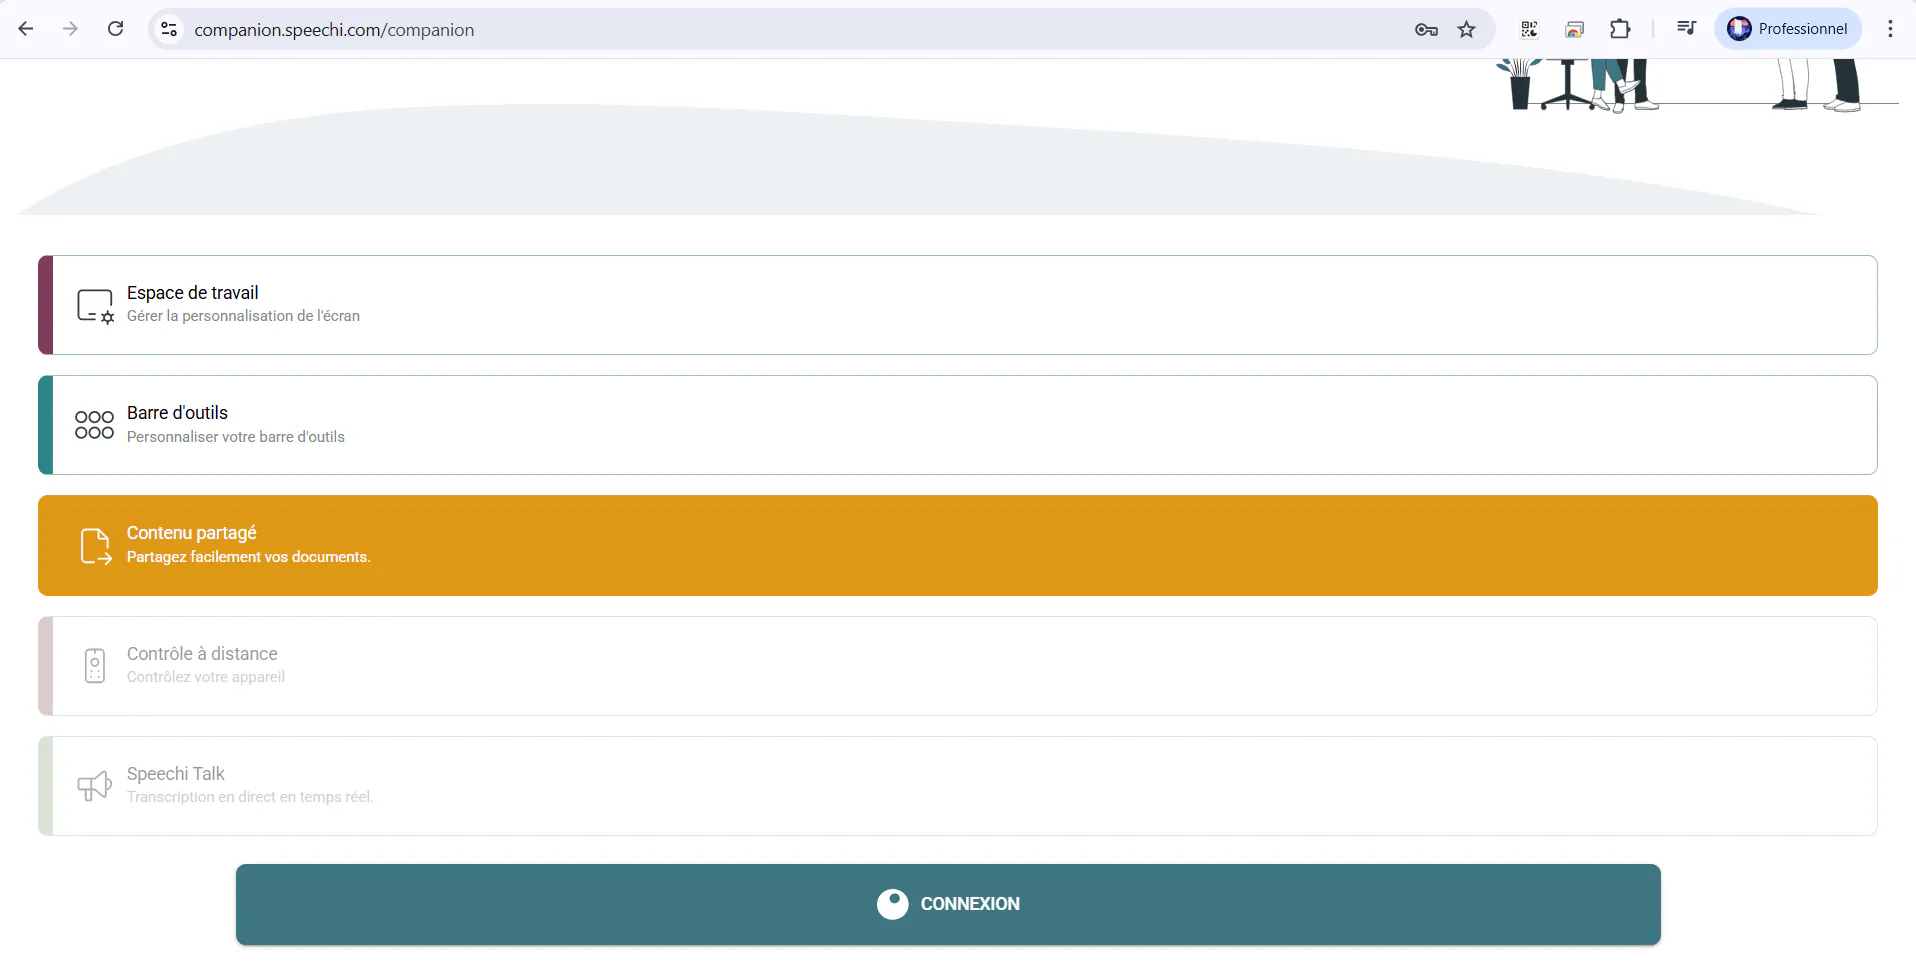
› You are given the option to download, with one click, the file you want from your cloud into your Connect space (and not onto the display itself). You can then edit and annotate the file and later find it in the shared files of your Speechi Connect account.
Video Tutorial 🎥 (↑)
Step-by-Step Tutorial (↑)
Step 1: Create access to your Drive in your Connect space
1- First, go to your Speechi Connect application (on PC, smartphone, or tablet). Then click on your avatar at the top left of the application and select Cloud Connect.

2- Cloud Connect allows you to link one of the following three Drives: Google Drive, OneDrive, or Nextcloud. Click on the one of your choice.

3- Follow the steps required by the selected Drive and authorize Speechi Connect to display your Drive.

4- Click the “Add the Speechi Cloud” button.

5- Return to the main menu, go to the “Workspace” tab, and save it to integrate the Speechi Cloud into your workspace.

Step 2: Use your Drive with Connect on a Speechi interactive display
1- Log in to your Connect workspace on the Speechi interactive display and click on Speechi Cloud to display your Drive.

2- On the right, the documents from your Drive are listed. Search for a document using the search bar at the top right of the screen.

3- Click on a document from your Drive to download it to your Speechi Connect workspace. The downloaded document appears on the left.

4- To display your downloaded document on the screen:

Click on the document once it appears in the left-hand section of Cloud Connect called “My secure screen space”…

…or find it in the Swift bar, under the “Shared documents” tab.
5- Work on your document by annotating it, then save your annotations.

6- Go to your Speechi Connect application and open the “Shared content” tab to retrieve your annotated document by downloading it.

This tutorial has shown you how to securely access your Drive on any Speechi interactive display within your organization using Connect. Feel free to check out our other tutorials listed below to master this personalized and secure workspace.
Our Articles on Speechi Connect (↑)
- Nextcloud on Speechi Connect
- Speechi Connect 2.0 : New functionalities
- Our New Speechi Connect Offering
- Talk, Stream & Vault: The 3 New Speechi Connect Features Coming Soon to Your Speechi Interactive Display
- Speechi Connect & its app store
- Teaching maths with educational apps from the Speechi Connect store
- Speechi Connect on your company’s interactive display: what’s the benefit?
- Class Connect on Speechi Interactive Displays at My School: What’s the Benefit?
- Connect Tutorial #1: Personalize My Speechi Interactive Display
- Connect Tutorial #2: Sharing My Files on the Speechi Interactive Display
- Connect Tutorial #3: Introducing the Swift Bar, the Key Feature of the Speechi Connect Interface
- Connect Tutoriel #4 : Starting a video conference with Speechi Connect
- A Day of Teaching with Class Connect
- A Workday with Speechi Connect
- New in Speechi Connect: An Even More Personalized Interactive Experience
 Connect Tutorial #3: Introducing the Swift Bar, the Key Feature of the Speechi Connect Interface
 Connect Tutorial #4: Starting a video conference with Speechi Connect
 Interactive Whiteboard workspace customisation with Speechi Connect !
 Interactive screen workspace : how to customize your environment with Speechi Connect !